Author: Admin

The parts of a SAS Key

Whenever I generated a SAS key for allowing access to a storage I have always wondered what all the different parts actually mean, today I found out.

(Source: MS Learn I added some information)

Lets look at this generated key: https://myaccount.blob.core.windows.net/?restype=service&comp=properties&sv=2021-06-08&ss=bf&st=2015-04-29T22%3A18%3A26Z&se=2015-04-30T02%3A23%3A26Z&srt=s&sp=rw&sip=168.1.5.60-168.1.5.70&spr=https&sig=F%6GRVAZ5Cdj2Pw4tgU7IlSTkWgn7bUkkAg8P6HESXwmf%4B

Parameter Example Description
Resource URI https://myaccount.blob.core.windows.net/?restype=service&comp=properties Defines the Azure Storage endpoint and other parameters. This example defines an endpoint for Blob Storage and indicates that the SAS applies to service-level operations. When the URI is used with GET, the Storage properties are retrieved. When the URI is used with SET, the Storage properties are configured
Storage version sv=2015-04-05 For Azure Storage version 2012-02-12 and later, this parameter indicates the version to use. This example indicates that version 2015-04-05 (April 5, 2015) should be used.
Storage service ss=bf Specifies the Azure Storage to which the SAS applies. This example indicates that the SAS applies to Blob Storage (b) and Azure Files (f). Also available are Queue (q) and Table (t)
Start time st=2015-04-29T22%3A18%3A26Z (Optional) Specifies the start time for the SAS in UTC time. This example sets the start time as April 29, 2015 22:18:26 UTC. If you want the SAS to be valid immediately, omit the start time.
Expiry time se=2015-04-30T02%3A23%3A26Z Specifies the expiration time for the SAS in UTC time. This example sets the expiry time as April 30, 2015 02:23:26 UTC.
Allowed resource type srt=s Specifies which resource types are accessible via the SAS. This example specifies that the accessible resource is in Blob Storage. Service (s), Container (c) and Object (o).
Permissions sp=rw Lists the permissions to grant. This example grants access to read (r) and write (w) operations.
IP range sip=168.1.5.60-168.1.5.70 Specifies a range of IP addresses from which a request is accepted. This example defines the IP address range 168.1.5.60 through 168.1.5.70.
Protocol spr=https Specifies the protocols from which Azure Storage accepts the SAS. This example indicates that only requests by using HTTPS are accepted, and why should you accept anything else?
Signature sig=F%6GRVAZ5Cdj2Pw4tgU7IlSTkWgn7bUkkAg8P6HESXwmf%4B Specifies that access to the resource is authenticated by using an HMAC signature. The signature is computed over a string-to-sign with a key by using the SHA256 algorithm, and encoded by using Base64 encoding.

Since permissions (sp) is a little more complex I listed them in a separate table.

Allowed persmission Description
r Read
w Write
d Delete
l List
a Add
c Create
u Update
p Process
i Immutable storage
y Permanently delete
x Enable deletion of versions
t Read/Write blob index
f Filter Blog index

Now I can finally decrypt a signature to find out which access rights have been assigned.

Pitfall when deploying Azure Function v4 and .net 6

I was tasked with setting up a Function environment. The Function was supposed to be hosted as a version 4 (~4) and was written in .net 6. No problem, right? Wrong!

The error

This was the error I got:

Your app is pinned to an unsupported runtime version for '~4'. For better performance, we recommend using one of our supported versions instead: ~3.

To me that seems like a you problem but as ever Azure says it’s mine.

The hunt

I used Bicep to deploy the Azure function, but in order to find all the settings that might be needed I opened the JSON view of the Function in the Azure Portal. The Function was pushed to development by the developer and it was up to me to deploy it in TEST and PROD.

The JSON view is an awesome feature. On the overview page of almost all services, you will find it up and to the right. It’s just a link:

If you click it, you get the JSON/ARM representation of the service:

You can find all the settings that you might want to look up, such as Always On or which server farm it is connected to.

The find

I found this article from Microsoft, which I recommend, but at the same time it should not have to exists. It addresses all kinds of issues you can encounter when using Azure Functions 4.

The solution

You need to tell Azure what version of dotnet you are using. This only needs to be done when using version 4 and .net 6.
Add this setting to your Bicep:

properties: {
     siteConfig: {
         netFrameworkVersion: 'v6.0'
     }
 }

Then redeploy and the error message dissappears.

The grief

Now the pitfall part is that if you look into the JSON view of the Function and try to find that setting … it is null. Even after your redeploy.

So, how are we supposed to know that needs to be set?

Boo! Boo I say.

Custom domain for a static webapp using Bicep

Bicep and static web apps

In my experience, static web apps is almost too easy. Setting up one is really easy and deploying code is only one single step! This too easy approach is found in setting up custom domains.

There is a really good and easy to follow article in the official docs. There is even a video showing you the process. It does not, however, show you how to do it using Bicep.

My Bicep for provisioning the static app

Here is the Bicep I use to provision a new staticweb app:

var webappName = 'Identifier-${env}-stapp'

resource staticwebApplication 'Microsoft.Web/staticSites@2021-03-01' = {
  name: webappName
  location: location
  properties:{
    stagingEnvironmentPolicy:'Enabled'
    allowConfigFileUpdates: true
  }
  sku: {
    tier: 'Free'
    name: 'Free'
  }

  tags: resourceGroup().tags
}

How to add a custom domain using Bicep

The steps for adding a custom domain are outlined in the documentation linked above, but the steps are these:

  1. Find your static web app’s autogenerated URL.
  2. Update your DNS with a CNAME-record pointing your domain to that autogenerated URL.
  3. Update the Custom Domain setting. (Run the Bicep update)

Step 1 and 2 has to be done before running the Bicep update.

The Bicep

The official documentation is very limited I am sorry to say. That is the reason I wrote this post.

Here is my Bicep for setting a custom domain:

var domain = {
  PROD: {
    fqdn: 'smart.workdomain.com'
  }
  TEST: {
    fqdn: 'test-smart.workdomain.com'
  }
  DEV: {
    fqdn: 'dev-smart.workdomain.com'
  }
}

resource staticwebApplicationDomain 'Microsoft.Web/staticSites/customDomains@2022-03-01' = {
  name: domain[env].fqdn
  parent: staticwebApplication
}

A couple of things to point out.

  • The parent is the static web app created above.
  • You do not need to add your SSL-cert, Azure takes care of that for you. Almost too simple.
  • The name is the domain you need to add.
  • Adding the domain takes about 10-15 minutes. So don’t give up.

Configuring Network settings for PostgreSQL using Bicep

At work I always get new Azure Services to deploy and I always use Bicep. Here is how to manage network settings for PostgrSQL flexible server. This is the service one, not the “run on a Linux VM one”. ALWAYS use the service flavor.

Basic PostgreSQL bicep

Getting the Bicep from an existing Azure resource is super simple. Use VS code and the Command Palette (Ctrl+Shift P) and type Bicep: Insert Resource. Bom! There is your Bicep code and to understand it, here is the documentation reference.

Network settings

These are not found in the export and you have to add them manually (not great), but that is because it is a subtype. It is a separate type but can only exist when connected to another type. The definition is not hard to find:

resource symbolicname 'Microsoft.DBforPostgreSQL/flexibleServers/firewallRules@2022-01-20-preview' = {
  name: 'string'
  parent: resourceSymbolicName
  properties: {
    endIpAddress: 'string'
    startIpAddress: 'string'
  }
}

These are the same settings that you would use for an Azure SQL Server, it is just connected to a DBforPostgreSQL flexible server.
Simply add all the IP-ranges you need to allow. Such as “the office in Stockholm” or “the consultant”.

Allow Azure Services

This is a special case and you need to configure a specific rule for it, allowing the IP-range 0.0.0.0 to 0.0.0.0.

resource AllowAzureServices 'Microsoft.DBforPostgreSQL/flexibleServers/firewallRules@2022-01-20-preview' = {
  parent: PostgreSQLDB
  name: 'AllowAllAzureIps'
  properties: {
    endIpAddress: '0.0.0.0'
    startIpAddress: '0.0.0.0'
  }
}

D365 F&O Batch Job done notification

A while ago I posted an easy how-to guide for calling APIs in Dynamics 365 Finance and Operations (or D365 F&O to its friends). In that post I looked for statuses of batch jobs. This is the follow up post on how to get notified when a batch job is done.

Batch job and alerting

You can configure a batch to send you an e-mail when the batch is done, or errored, but an e-mail is not very computer to computer friendly. I needed a response back so the next action (or batch) could be executed.

If you only need an e-mail when a batch is done. I suggest you check out this page.

I am actually surprised that this is not a feature in D365 but it is easy enough to build using Logic Apps.

The D365 APIs

If you need information on connecting to the APIs you can find that in my last post Talking to the D365 F&O Rest APIs.

The secret here is to use two features: A callback Url and a do-while loop.

What is a callback URL?

Glad you asked. When you call an API the operation might take a long time to complete, such as creating a new order or running a batch. Instead of either waiting for a very long time or getting a timeout, you give the call a callback URL. This URL is basically saying “When you are done, reply to this address”.

When calling such an endpoint you supply the callback URL as a header or part of a message body, and the service should reply with a 202 Accepted, meaning “I received your message and will get back to you.”

Setting up a callback URL is not the scope of this post. In my scenario it was handled by Azure Data Factory and was just a tickbox.

The Logic App flow

Your exact needs may differ, but we decided on getting a batch ID and the callBackURL as properties of the POST body.
The flow started the batch using the standard Logic Apps connector.

Then the Logic App simply queries the “Batch Status” in the D365 Data API until the batch is not executing anymore.

When the batch is done, or there is an error of some sort, we respond back using the callback URL.

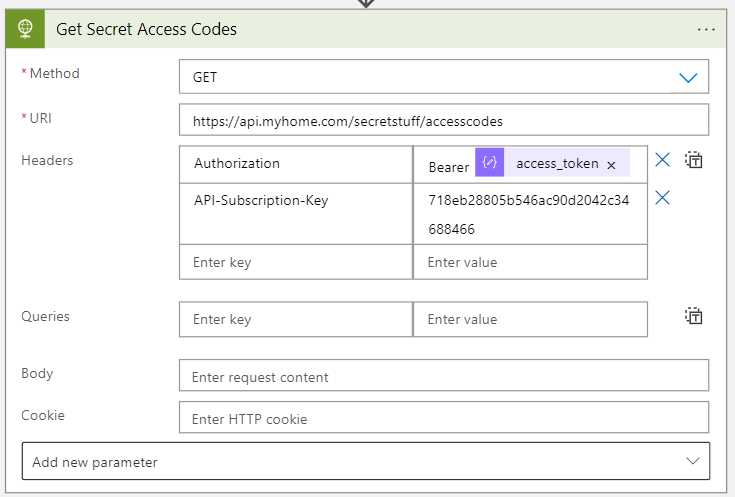
Here is what the Get Batch Status from Data-API looks like:

Details about the call can be found in the earlier post.

A warning!

This will not work on so called “scheduled batch jobs”. The reason is that if you trigger them, ie set to waiting, they will just continue to wait until the scheduling kicks in. In the Logic App above this will respond back as an error.

If you need to be able to trigger the jobs imediatly, you need to remove the scheduling. But that is kind of the reason why you need to do this anyway.

Tips for testing

If you trigger the Logic App using Postman you cannot really handle the callback and you need to setup another endpoint for your Logic App to respond to. I used RequestBin, which solves this problem 100%.

Conclusion

Setting this up is really easy and I am sure you can do it using Power Automate. I am just a Logic App guys and likes solving things using Logic Apps. Adding this to your Azure Data Factory or similar makes you able to call a pipeline “when the first one is done” instead of using scheduling.