What is this?
The documentation on how to deploy Logic Apps Connectors in a proper CI/CD scenario is … lacking.
Being able to use Connectors and to deploy them automatically, is a must in today´s enterprise landscape. I have worked with Connectors for two years and have just recently been able to have everything fully automated.
Also: A huge shout-out to Maxim Zhizhin for solving the last part of the problem and sharing it with me.
Who is this for?
This is not a full walkthru on how to use Connectors, and it mostly focuses on how to use a Connector to connect to an on-premise service, i.e. using the On Premise Data Gateway.
If you are looking at how to incorporate a Custom Connector into your CI/CD setup using ARM, this is for you.
The TLDR
If you know what you are doing and is just looking for the ARM-template file, you can get it here.
The Steps
These are the steps:
- Finnish configuring you connector.
- Export the Starting ARM Template
- Examining the ARM
- Adding the Swagger/OpenAPI Definition to the ARM template
- Adding additional settings
- The Parameter File
- Trying to deploy
Finnish configuring your connector
You have created a Logic App Custom Connector and know that it is working properly. In my case I built a SOAP Passthru (the best way to connect to SOAP services). The SOAP service is located on-premise. It looks like this:


The service sends a POST with a header for the SOAPAction (which a SOAP service needs) and another header for Content-type, signaling to the SOAP service that we are using XML and also in what encoding,
Export the Starting ARM Template
I put emphasis on starting because this ARM Template that will be exported is in NO WAY complete.
- Find the Export Template in the starting page of the Connector (it is under automation).

- Click it and after the template has been generated, find Download at the top of the screen.
- Download and open the file using your preferred tool. I am using VS Code.
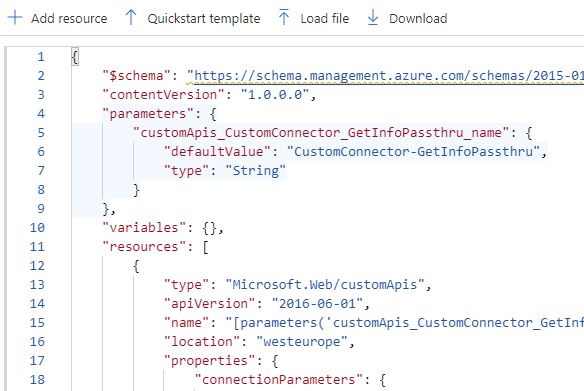
Examining the ARM
Looking from the top to the bottom, you first have a parameter for the connector name. Then you have basic information about the region. Further down you have information about authentication (basic or none), and funny enough some information about how to fill in the UI for the auth part.
Then we come to the use of the gateway which is a repeat of the auth settings. Is should look like this:
"gateway": {
  "type": "gatewaySetting",
  "gatewaySettings": {
    "dataSourceType": "CustomConnector",
    "connectionDetails": []
  },
  "uiDefinition": {
    "constraints": {
      "tabIndex": 4,
      "required": "true",
      "capability": [
        "gateway"
      ]
    }
  }
}
This only defines the UI for use of the gateway, it does not actually implement it.
Scroll further and you have some basic settings, like the name and description. If you have used an Icon it will be exported as a base64 encoded.
Adding the Swagger/Open API definition
The ARM Template you have saved is not complete. You have to manually add the Open API definition to it.
To find the information you go back to the portal, and the start page (Overview) of the Connector. Find the Download link at the top.

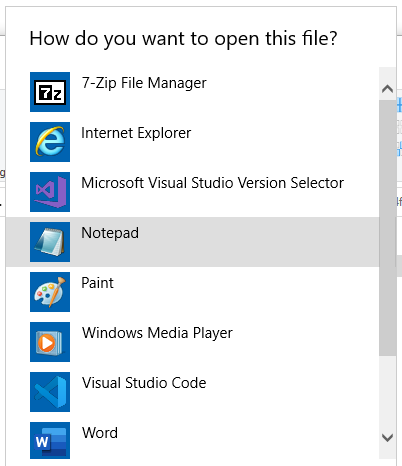
Click to download the file. Note! The file has no file extension and therefore you have to choose a text tool to open it.
Copy the text from the file into a new property called swagger, and add the copied text. The end result should look like this:
"swagger": {
        "swagger": "2.0",
        "info": {
            "title": "SOAP pass-through",
            "description": "Get Info SOAP passthru",
            "version": "1.0"
        },
        ...
    }
}
Adding Additional Settings
There are four additional settings you need to manually enter in order for this to work properly.
All these settings should be on the same level as "iconUri", so just add these settings before that property.
apiType
Set this property to
"apiType": "Soap"backendService
This property is the path to the on-premise service as if you published your connector on the same network. In my case this is
"backendService":{ "serviceUrl": "http://onpremservice/webservices"}wsdlDefinition
This is mostly used if you are not using the SOAP passthru method. If you do you should set it to:
"wsdlDefinition": {
   "importMethod": "SoapPassThrough"
}
capabilities
Setting this, tells the deployment to use the on premise data gateway, not only have the UI show it (see above). To make this happen add this property
"capabilities": ["gateway"]The parameter file
This file was downloaded with you initial export of the ARM-template and is located in the same Zip-file. You do not need a parameter file to make this work, it is just good practice. When adding a parameter file you can also have different parameter files for different environments, such as TEST or PROD.
The generated file only contains a single parameter but you should parameterize additional settings in the file to fully integrate the ARM-files in your CI/CD pipeline. Here are the settings I usually parameterize:
- Location make sure that the Location is the same as the resource group and set that from the CI/CD pipeline.
- BackendService ServiceUrl This might be different between TEST and prod for instance.
- Swagger Within the Swagger there might be multiple things that differ between environments. I usually make sure that Host is set by a parameter.
Trying to Deploy
If you do not want (or can´t) go thru the whole DevOps deploy pipeline to test this new ARM template, you can use a built in functionality in the Azure Portal.
In the search box at the top of the portal, search for deploy and select "Deploy a custom template".

This lands you on a page where you can enter your ARM-template and parameter files and deploy them.
- Select "Build your own template in the editor".
- Paste the ARM template JSON in the window.
- Click Save at the bottom left part of the page.
- If you are using a parameter file, click the "Edit parameters" link at the top right of the page.
- Paste the content of your parameter file and click Save at the bottom left.
- Done. Click Review+Create at the bottom left.
If my template can help you, I have uploaded it here.
In conclusion
The Logic App Custom Connector is an underestimated, underdone and under-documented feature in Azure, but if you know how to configure it and where to get the info, it is very useful.
Any questions or feedback regarding this post can be sent to my Twitter.
Hope this helps.
One comment
Comments are closed.