What is this?
I have found a new connector which is much better suited for calling OnPrem services from Logic Apps.
The use of a custom connector
A custom connector is meant to be a bridge between your Logic App and an on premise service, handling JSON or XMLSOAP. It can also be used as a way of minimizing the clutter in a confusing API and exposing only the necessary settings to your Logic App developer. You do not even have to access on premise services using the connector.
I have have some experience in setting up OnPrem integrations and have posted about Planning installation of the On Premise Gateway and finally solving how to deploy the Custom Connector using ARM.
A better connector
My use of the Custom Connector has always been to call OnPrem services that are either SOAP or JSON based. For that I have used a custom connector but there is a great alternative, if you know how to create XML Envelopes or JSON bodies. The only thing you will loose using this connector is the nice interface in the Logic App.
Let me point you to the HTTP with Azure AD connector, and yes you can use it with Azure AD but this post is about replacing your Custom Connectors.
The scenario
I have an OnPrem service that uses old school SOAP and XML to provide information about Customers. The service uses Windows Authentication and will respond with the given customer as an XML response.
If you don´t know SOAP: it is basically a HTTP POST with a header named SOAPAction and an XML body. I will show you a JSON call at the end as well.
Using the connector
Prerequisite: In order to access OnPrem services, you must install the OnPrem data gateway.
Add the connector to a Logic App
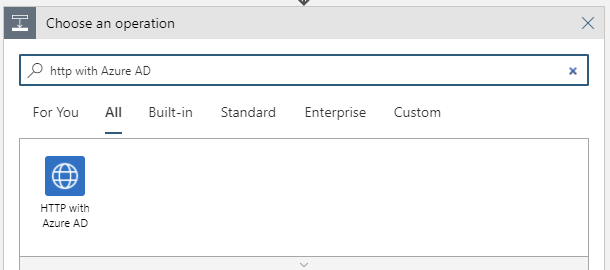
Add a new Action the same way as always, Search for HTTP with Azure AD. I know, it says Azure AD. It is strange but trust me.
Now look at the available Actions.
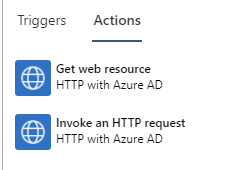
The first one will only use the GET HTTP verb. Choose the other one.
You will now get this scary image.
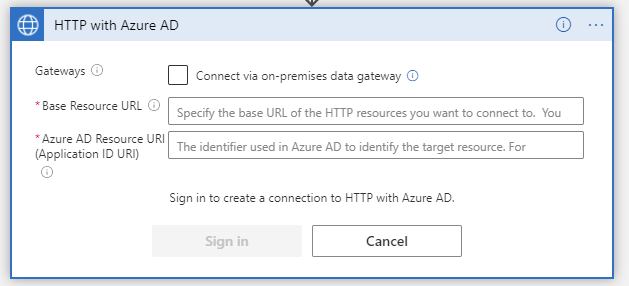
I know it says Azure AD but here comes the payoff. Click the Connect via On-premises data gateway checkbox.
TADAAAAA! You can now start filling in the settings for your service call, directly to the OnPrem Service without using a Custom Connector.
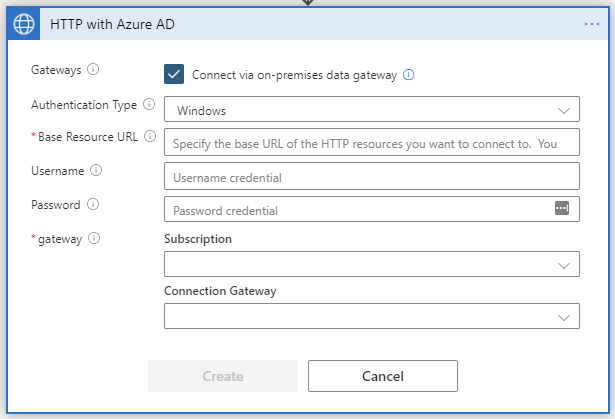
Configure the connector
Authentication Type
Start by choosing the Authentication Type. Note that the Username and Password fields are still visible, even if you choose Anonymous.
I will use Windows Authentication, which, by the way, is not supported in the Custom Connector.
Base Resource URL
This is the start path to your service URL as if it was called from within the OnPrem network.
A full service URL might look like this: http://webapiprod/EmployeeService/GetEmployee.asmx, then the base would be http://webapiprod/EmployeeService or http://webapiprod depending on how you want to slice it. The full service URL will be defined later. Also notice that you do not end the base url with a /.
I will call a service with the full path http://erpsystem/WebServices/GetCustomers.asmx so I opt for http://erpsystem/WebServices
Windows Authentication
This is very simple: enter the username (including domain) and password to the OnPrem user you need to use for authentication. I have entered the username and domain like this companydomain\erpwebusr
Gateway
Choose the appropriate subscription and gateway. I have to censor mine for obvious reasons.
Done
The final product looks like this:
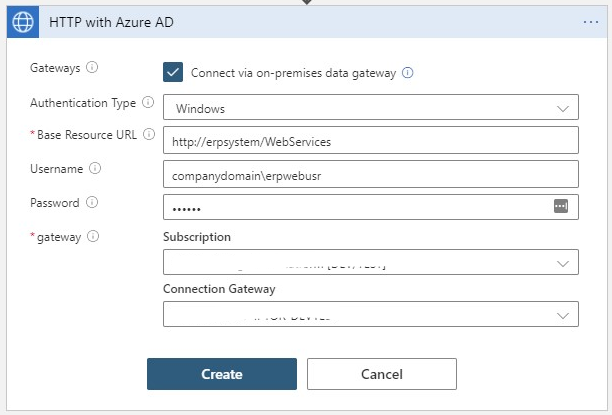
Just click Create to start using it.
Start using the connector
I test a lot of APIs in its raw format, using Postman or HTTP RestClient with VS Code or even SOAPUI back in the day. I know how to format a message. I think you do too. I will now configure the connector to execute a call to the SOAP service to get Customer data.
Choose a Method
You have to choose the HTTP verb you need. For SOAP you always use a POST, but your service might need to use a GET.
Url of the request
Here you can either enter the full url or the last part depending on how you feel about either.
My full path was http://erpsystem/WebServices/GetCustomers.asmx and I opted for http://erpsystem/WebServices as the base path. Therefore I can either enter the full path, or be fancy and just enter /GetCustomers.asmx. I am fancy.
Headers
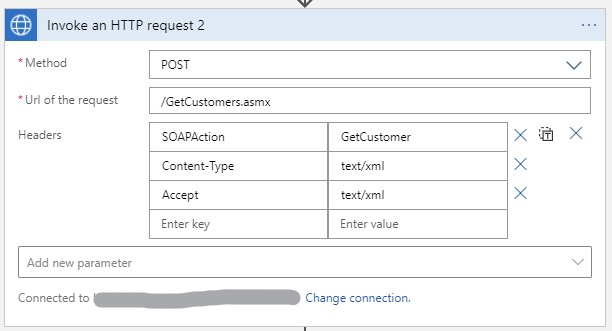
You need to add headers to your call. In the case of SOAP, you need SOAPAction, Content-type and lastly an Accept header.
The last one seems to tell the connector what data to expect back. If you do not set this to text/xml, the connector will expect a JSON message and give you a 400 Bad Request back.
If you call a Rest-service you will only need a content type if you supply a BODY.
You might also need to send additional headers, like API-keys and such. Simply add the ones you need.
Add headers by clicking the Add new parameter dropdown.
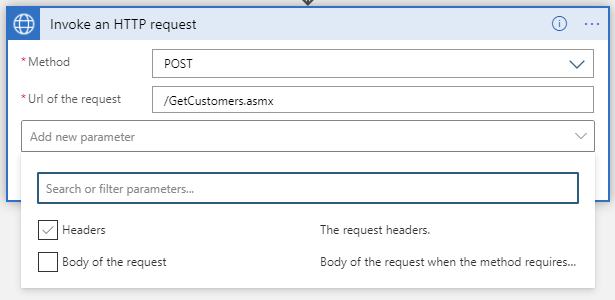
Select Headers and fill in the headers you need, depending on your needs. For SOAP these are located in the WSDL-file.
I need to set SOAPAction: GetCustomer, Content-type: text/xml and Accept: text/xml
Body of the request
If you are calling a SOAP service or sending data to a rest service, you need to set the body. This Connector even supports XML in the designer. So simply supply the XML you need to execute your call. I must send this:
<soap:Envelope xmlns:soap="http://www.w3.org/2003/05/soap-envelope" xmlns:get="http://erpsystem/webservices/GetCustomers" xmlns:cus="http://myns.se/customer" xmlns:man="http://www.erpsystem.com/Manager">
   <soap:Header/>
   <soap:Body>
      <get:Execute>
         <get:request>
            <get:_requests>
               <get:GetCustomers>
                  <cus:customer_Id>XXXX</cus:customer_Id>
               </get:GetCustomers>
            </get:_requests>
         </get:request>
      </get:Execute>
   </soap:Body>
</soap:Envelope
I know. SOAP was not aimed at being lightweight.
The XXXX part will be replaced by the customer ID sent to the Logic App.
The end product looks like this:

The Accept header is missing in the picture. It is from an earlier version of this post.
Calling the backend service
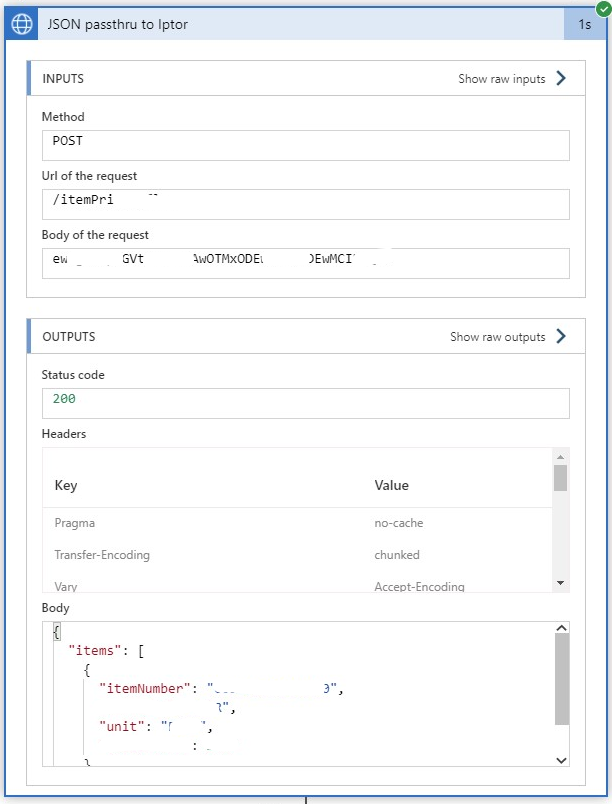
A call to the service might look like this (I blocked out some sensitive things):
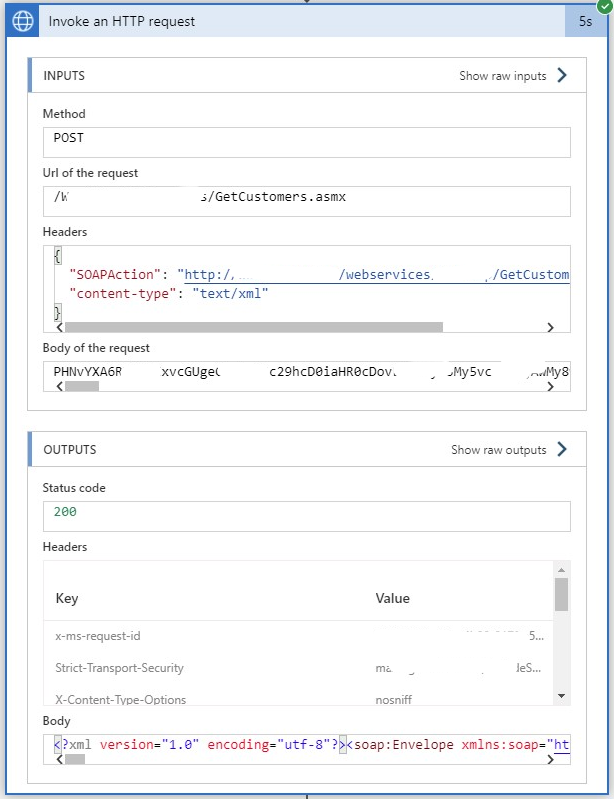
Looking at the call
Please note that the Body of the request is always sent as a Base64 encoded. This means that you need to have access to a decoder to read what you actually sent. It also means that the service you are calling must accept Base64 encoded payloads. Binary payloads are not supported.
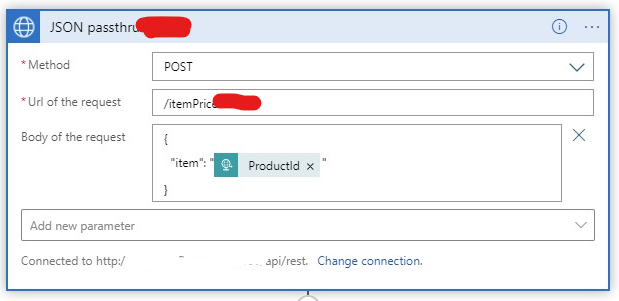
Looking at a JSON Call
Here is an Action configured for JSON and the resulting execution. The use of POST and sending the customer ID in the message body is due to the design of the service. I would also add a content-type to the call, just to be sure.
Conclusion
As long as you do not have the need to send data in binary to a backend service, you should really start using this connector and not bother with the custom connector.
2 comments
Comments are closed.