Month: September 2022

Pitfall when deploying Azure Function v4 and .net 6

I was tasked with setting up a Function environment. The Function was supposed to be hosted as a version 4 (~4) and was written in .net 6. No problem, right? Wrong!

The error

This was the error I got:

Your app is pinned to an unsupported runtime version for '~4'. For better performance, we recommend using one of our supported versions instead: ~3.

To me that seems like a you problem but as ever Azure says it’s mine.

The hunt

I used Bicep to deploy the Azure function, but in order to find all the settings that might be needed I opened the JSON view of the Function in the Azure Portal. The Function was pushed to development by the developer and it was up to me to deploy it in TEST and PROD.

The JSON view is an awesome feature. On the overview page of almost all services, you will find it up and to the right. It’s just a link:

If you click it, you get the JSON/ARM representation of the service:

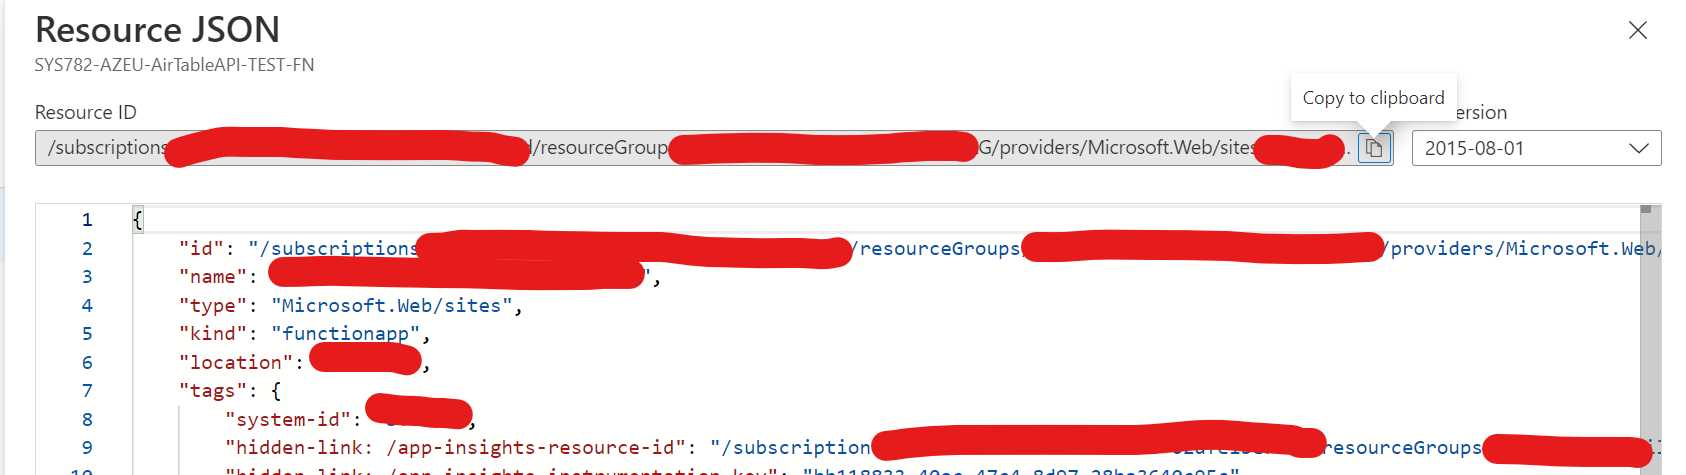
You can find all the settings that you might want to look up, such as Always On or which server farm it is connected to.

The find

I found this article from Microsoft, which I recommend, but at the same time it should not have to exists. It addresses all kinds of issues you can encounter when using Azure Functions 4.

The solution

You need to tell Azure what version of dotnet you are using. This only needs to be done when using version 4 and .net 6.
Add this setting to your Bicep:

properties: {
     siteConfig: {
         netFrameworkVersion: 'v6.0'
     }
 }

Then redeploy and the error message dissappears.

The grief

Now the pitfall part is that if you look into the JSON view of the Function and try to find that setting … it is null. Even after your redeploy.

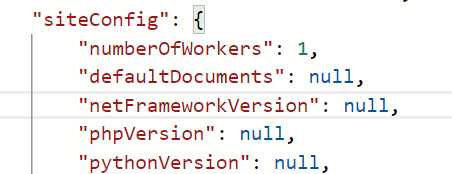
So, how are we supposed to know that needs to be set?

Boo! Boo I say.

Custom domain for a static webapp using Bicep

Bicep and static web apps

In my experience, static web apps is almost too easy. Setting up one is really easy and deploying code is only one single step! This too easy approach is found in setting up custom domains.

There is a really good and easy to follow article in the official docs. There is even a video showing you the process. It does not, however, show you how to do it using Bicep.

My Bicep for provisioning the static app

Here is the Bicep I use to provision a new staticweb app:

var webappName = 'Identifier-${env}-stapp'

resource staticwebApplication 'Microsoft.Web/staticSites@2021-03-01' = {
  name: webappName
  location: location
  properties:{
    stagingEnvironmentPolicy:'Enabled'
    allowConfigFileUpdates: true
  }
  sku: {
    tier: 'Free'
    name: 'Free'
  }

  tags: resourceGroup().tags
}

How to add a custom domain using Bicep

The steps for adding a custom domain are outlined in the documentation linked above, but the steps are these:

  1. Find your static web app’s autogenerated URL.
  2. Update your DNS with a CNAME-record pointing your domain to that autogenerated URL.
  3. Update the Custom Domain setting. (Run the Bicep update)

Step 1 and 2 has to be done before running the Bicep update.

The Bicep

The official documentation is very limited I am sorry to say. That is the reason I wrote this post.

Here is my Bicep for setting a custom domain:

var domain = {
  PROD: {
    fqdn: 'smart.workdomain.com'
  }
  TEST: {
    fqdn: 'test-smart.workdomain.com'
  }
  DEV: {
    fqdn: 'dev-smart.workdomain.com'
  }
}

resource staticwebApplicationDomain 'Microsoft.Web/staticSites/customDomains@2022-03-01' = {
  name: domain[env].fqdn
  parent: staticwebApplication
}

A couple of things to point out.

  • The parent is the static web app created above.
  • You do not need to add your SSL-cert, Azure takes care of that for you. Almost too simple.
  • The name is the domain you need to add.
  • Adding the domain takes about 10-15 minutes. So don’t give up.

Configuring Network settings for PostgreSQL using Bicep

At work I always get new Azure Services to deploy and I always use Bicep. Here is how to manage network settings for PostgrSQL flexible server. This is the service one, not the “run on a Linux VM one”. ALWAYS use the service flavor.

Basic PostgreSQL bicep

Getting the Bicep from an existing Azure resource is super simple. Use VS code and the Command Palette (Ctrl+Shift P) and type Bicep: Insert Resource. Bom! There is your Bicep code and to understand it, here is the documentation reference.

Network settings

These are not found in the export and you have to add them manually (not great), but that is because it is a subtype. It is a separate type but can only exist when connected to another type. The definition is not hard to find:

resource symbolicname 'Microsoft.DBforPostgreSQL/flexibleServers/firewallRules@2022-01-20-preview' = {
  name: 'string'
  parent: resourceSymbolicName
  properties: {
    endIpAddress: 'string'
    startIpAddress: 'string'
  }
}

These are the same settings that you would use for an Azure SQL Server, it is just connected to a DBforPostgreSQL flexible server.
Simply add all the IP-ranges you need to allow. Such as “the office in Stockholm” or “the consultant”.

Allow Azure Services

This is a special case and you need to configure a specific rule for it, allowing the IP-range 0.0.0.0 to 0.0.0.0.

resource AllowAzureServices 'Microsoft.DBforPostgreSQL/flexibleServers/firewallRules@2022-01-20-preview' = {
  parent: PostgreSQLDB
  name: 'AllowAllAzureIps'
  properties: {
    endIpAddress: '0.0.0.0'
    startIpAddress: '0.0.0.0'
  }
}