There are a lot of different ways to make this happen but, like before, I was looking for the “quick and easy way” to just get it done. So here is a condensed version. Please send me feedback if you find errors or need clarification in any areas. I would also like to point to the official Azure Storage API documentation.
Later update
Since I wrote this post Microsoft has done a lot of work on the permission side of the file service. This means that this post does not support the latest version. The simple and easy way I propose is still usable. You just need to add this header: x-ms-version:2018-11-09. All the examples below uses this header.
Tools
For testing the Rest APIs I recommend using Postman.
Create a file storage
First you need to create a file storage in Azure. More information can be found here
For this I created a storage account called bip1diag306 (fantastic name I know), added a file share called “mystore”, and lastly added a subdirectory called “mysubdir”. This is important to understand the http URIs later in this post.
Create a SAS key
In order to give access to your files you can create an SAS key, using the Azure Portal. The SAS key is very useful since it is secure, dependable, easy to use and can be set to expire at a given time, if you need it.
At the moment, a SAS key created in the portal can only be set for the entire storage account. It is possible to set a particular key for a folder but in that case, you have to use code.
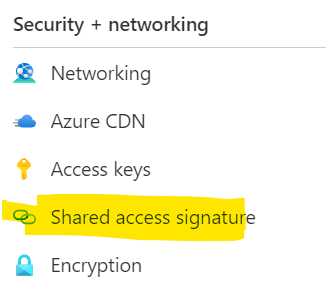
To create an SAS key using the portal, open the overview for the storage account and look in the menu to the left. Find “Shared Access Signature” and click it.
Select the access option according to the image. This will make sure you can create and upload a file.
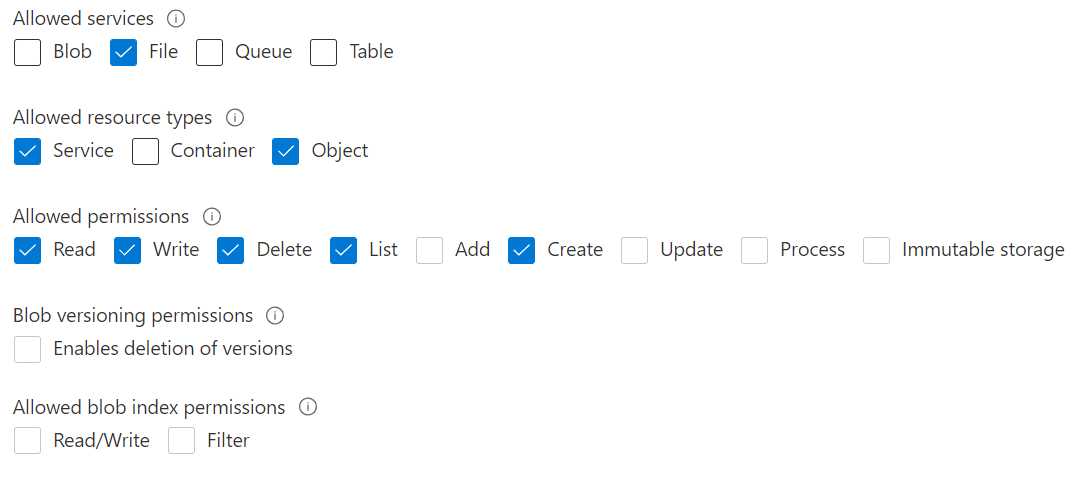
Make sure the Start date and time is correct, including your local (calling) time zone. I usually set the start date to “yesterday” just to be sure and then set the expiration to “next year”.
Click the “Generate SAS” button. The value in “SAS Token” is very important. Copy it for safekeeping until later.
Create and then upload
The thing that might be confusing is that the upload must happen in two steps. First you create the space for the file, and then you upload the file. This was very confusing to me at first. I was looking for an “upload file” API, but this is the way to do it.
There are a lot more things you can configure when calling this API. The full documentation can be found here. Note that the security model in that documentation differs from the one in this article.
Create
First you need to call the service to make room for your file.
Use postman to issue a call configured like this:
PUT https://[storagename].file.core.windows.net/[sharename][/subdir]/[filename][Your SAS Key from earlier]
x-ms-type:file
x-ms-content-length:file size in bytes
x-ms-version:2018-11-09
Example
If I was tasked with uploading a 102-byte file, called myfile.txt to the share above, the call would look like this:
PUT https://bip1diag306.file.core.windows.net/mystore/mysubdir/myfile.txt?sv=2020-08-04&ss=f&srt=so&sp=rwdlc&se=2021-12-08T21:29:12Z&st=2021-12-08T13:29:12Z&spr=https&sig=signaturegoeshere
x-ms-type:file
x-ms-content-length:file size in bytes
x-ms-version:2018-11-09
Upload
Now, it is time to upload the file, or to fill the space we created in the last call. Once again there is a lot more you can set when uploading a file. Consult the documentation.
Use postman to issue a call configured like this:
PUT https://[storagename].file.core.windows.net/[sharename][/subdir]/[filename]?comp=range&[Your SAS Key from earlier] (remove the ?-sign you got when copying from the portal).
x-ms-write:update
x-ms-range:bytes=[startbyte]-[endbyte]
content-length:[empty]
x-ms-version:2018-11-09
Note the added parameter comp=range
Looking at the headers, the first one means that we want to “update the data on the storage”.
The second one is a bit trickier. It tells what part of the space on the storage account to update, or what part of the file if you will. Usually this is the whole file so you set it to 0 for the startbyte and then the length of the file in bytes minus 1.
The last one, is content-length. This is the length of the request body in bytes. In Postman, this value cannot be set but is filled for you automatically depending on the size of the request body, you can simply omit it if you want to. If you are using some other method for sending the request, you have to calculate the value.
If you are using PowerShell, it seems that this value is calculated as well, and you should not define a content-length header. You get a very strange error about the content-type if you try to send the content-length:
The cmdlet cannot run because the -ContentType parameter is not a valid Content-Type header. Specify a valid Content-Type for -ContentType, then retry.
Example
Returning to the 102-byte file earlier, the call would look like this:
PUT https://bip1diag306.file.core.windows.net/mystore/mysubdir/myfile.txt?comp=range&sv=2020-08-04&ss=f&srt=so&sp=rwdlc&se=2021-12-08T21:29:12Z&st=2021-12-08T13:29:12Z&spr=https&sig=signaturegoeshere
x-ms-write:update
x-ms-range:bytes=0-101
content-length:
x-ms-version:2018-11-09
The requestbody is the file content in clear text.
Limitations
There are limitations to the storage service. One which impacted me personally. You can only upload 4mb “chunks” per upload. So if your files exeed 4mb you have to split them into parts. If you are a good programmer you can make use of tasks and await to start multiple threads. Please consult the Azure limits documentation to see if any other restrictions apply.
Hi, Thank you for sharing this article. Any thoughts?
I am getting the following error for the second call
$azStorageEndPointFillFile = "https://$($azStorageAccountName).file.core.windows.net/$($azStorageFileShare)/$($azStorageDirectoryPath)/$($spolFileName)?comp=range&sv=$($azStorageAccountKey)"
$requestHeadersFillFile = @{"x-ms-range" = "bytes=0-$($localFileLength - 1)"
"x-ms-write" = "update"
"Content-Length" = $localFileLength
}
Invoke-RestMethod -Method Put -Uri $azStorageEndPointFillFile -Headers $requestHeadersFillFile -InFile $localFilePathError:
The cmdlet cannot run because the -ContentType parameter is not a valid Content-Type header. Specify a valid Content-Type for -ContentType, then retry. To suppress header validation, supply the -SkipHeaderValidation parameter.
You are using the PowerShell library and I think that is a bit different. I am using the APIs directly.
The error says that you are not using the correct content type. Perhaps PowerShell automatically adds a content type when you are calling Invoke-RestMethod, because the documentation of Put Range does not need a ContentType.
Looking at the documentation for the PowerShell method I think that the best thing to try is for you to simply add a content type header:
$requestHeadersFillFile = @{
“x-ms-range” = “bytes=0-$($localFileLength – 1)”
“x-ms-write” = “update”
“Content-Length” = $localFileLength
"Content-Type" = "application/octet-stream"
}
That content type basically means "any time of file".
Try that, email me directly if you need more help. Look at my contact me page to get the email.
Hi,
Thank you for your reply.
The suggestion to add content type is not working as well. Please find the code below
$azStorageAccountKey = ""
$azStorageAccountName = ""
$azStorageFileShare = ""
$azStorageDirectoryPath = ""
$localFileName = ""
$scriptExePath = $PSScriptRoot
$localFilePath = $scriptExePath + "/" + $localFileName
$localFileLength = (Get-Item $localFilePath).length
$azStorageEndPointCreateFile = “https://$($azStorageAccountName).file.core.windows.net/$($azStorageFileShare)/$($azStorageDirectoryPath)/$($localFileName)?sv=$($azStorageAccountKey)”
$requestHeadersCreateFile = @{
"x-ms-type" = "file"
"x-ms-version" = "2015-02-21"
"x-ms-date" = [System.DateTime]::UtcNow
"x-ms-content-length" = $localFileLength
}
Invoke-RestMethod -Method Put -Uri $azStorageEndPointCreateFile -Headers $requestHeadersCreateFile
$azStorageEndPointFillFile = “https://$($azStorageAccountName).file.core.windows.net/$($azStorageFileShare)/$($azStorageDirectoryPath)/$($localFileName)?comp=range&sv=$($azStorageAccountKey)”
$requestHeadersFillFile = @{
"x-ms-version" = "2015-02-21"
"x-ms-range" = "bytes=0-$($localFileLength – 1)"
"x-ms-date" = [System.DateTime]::UtcNow
"x-ms-write" = "update"
"Content-Length" = $localFileLength
"Content-Type" = "application/octet-stream"
}
Invoke-RestMethod -Method Put -Uri $azStorageEndPointFillFile -Headers $requestHeadersFillFile -InFile $localFilePath
Thank you very much for that code. I found some new things in there which I find useful.
After looking at this for a while I can see that the error is in the requestHeadersFillFile. You should remove the Content-Length header, or you can leave it blank. I do not really know why this works, but it does 🙂
Perhaps powershell overwrites it anyway.
The content-type seems to be ignored (at least in the version you are using) so you can omit that as well.
I will update my post to make it a bit clearer about the Content-Length Header.
Its working now by excluding the Content-Length header value. Thank you Micahel for your support !
I wrote an article around this topic with a different context. Please check the below link
https://sprider.blog/sync-sp-library-with-az-storage-container
Hi Bro, Thanks for this , But Can we use an Access Key rather than a SAS and Create a file ?
I don't think so. Access keys are for generating SAS-keys.
Some services needs this because they constantly recreate new SAS keys. SAS keys does not only define that you can access the storgae but also what kind of accessrights you have been assign, such as what services you can access.
You could also use proper OAUTH authentication with your Storage Services. You can perhaps find my poston how to just make it work useful.
Please let me know if there is something I can help you with.
Hi,
I tried this
VERB: PUT
URI: https://[storagename].file.core.windows.net/[sharename][/subdir]/[filename][Your SAS Key from earlier]
HEADERS:
x-ms-type:file
x-ms-content-length:file size in bytes
and I'm getting the below error.
<Code>MissingRequiredHeader</Code>An HTTP header that's mandatory for this request is not specified.
RequestId:5e3cb936-501e-001c-225a-45d642000000
Time:2021-05-10T05:08:55.6061926Z
x-ms-blob-type
Hi the Russ.
I think the answer is that I was using the "file-service" on a storage account and you where calling the "blob-service". Based on your error message. You did not call an endpoint that started with file.core.windows.net, but rather blob.core.windows.net.
Looking at the dokumentation for "Create Blob" you need to specify a blob type: https://docs.microsoft.com/en-us/rest/api/storageservices/put-blob#request-headers-all-blob-types Look a bit lower and you will find this:
x-ms-blob-type: Required. Specifies the type of blob to create: block blob, page blob, or append blob.
The thing with the file service is that it only handled "files" whereas blob handles "any blob of data", and so it needs a bit more information.
I have base64 string of an uploaded file and i want to upload base64 string using azure api. Please assist on this
Please be more specific. I understand you need to upload a file but why in base64 format?
Have you tried looking at content-type headers?