What is this?
There are a lot of articles out there on how to setup an App Registration in Azure. Most of them contains a lot of useful information on why, rather than how.
This article is only about the how.
What you need to do
- Log into Azure
- Find the App Registration page.
- Create the App registration
- Create the App Secret
- Where to find information you will probably need later.
The process
Login to Azure
Come on you know this. Why are you even reading this step?
Find the App Registration Page
The easiest way of doing this is to use the search field at the top of the page. Just type App Reg and it should pop up.
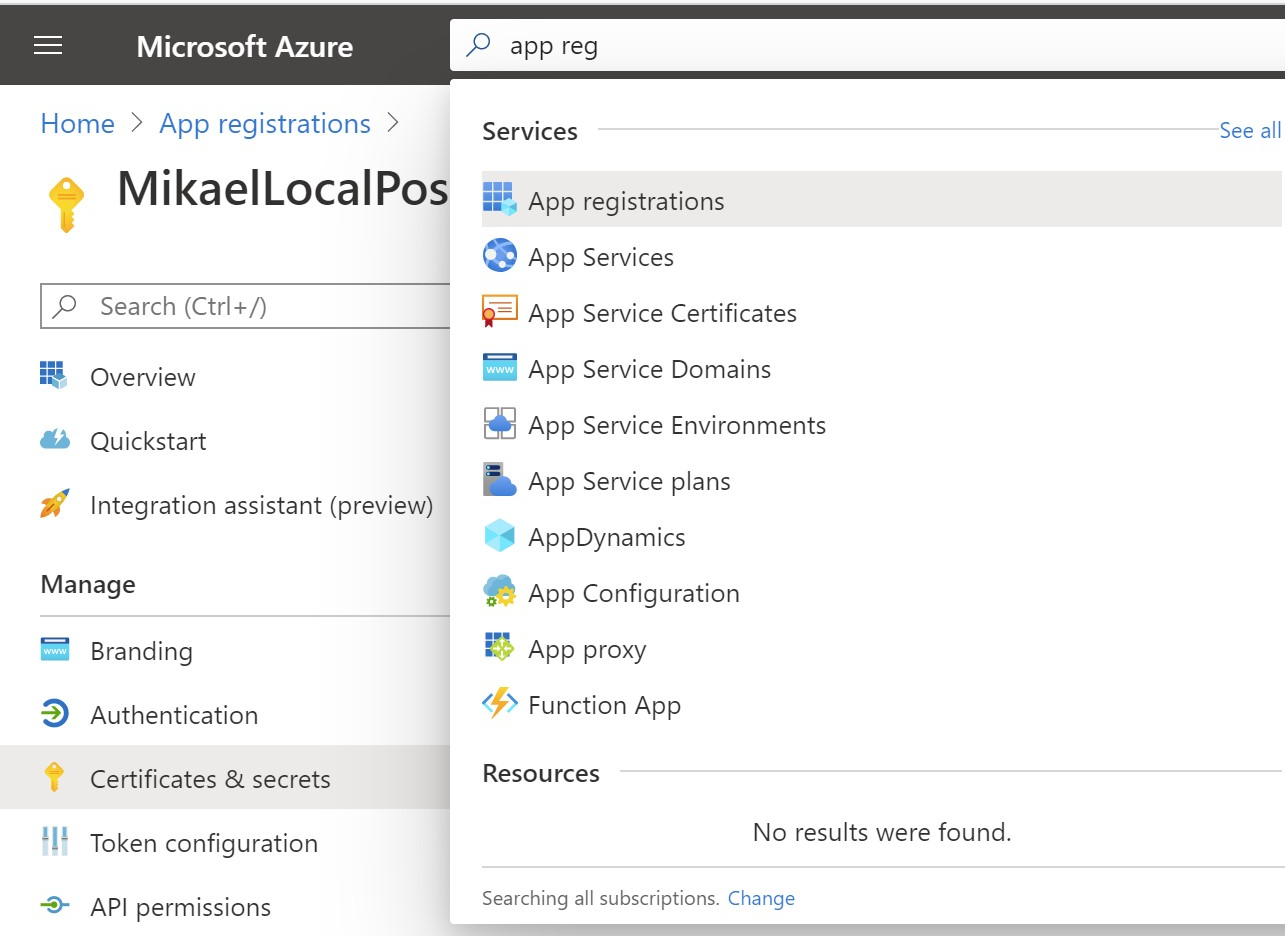
Select it.
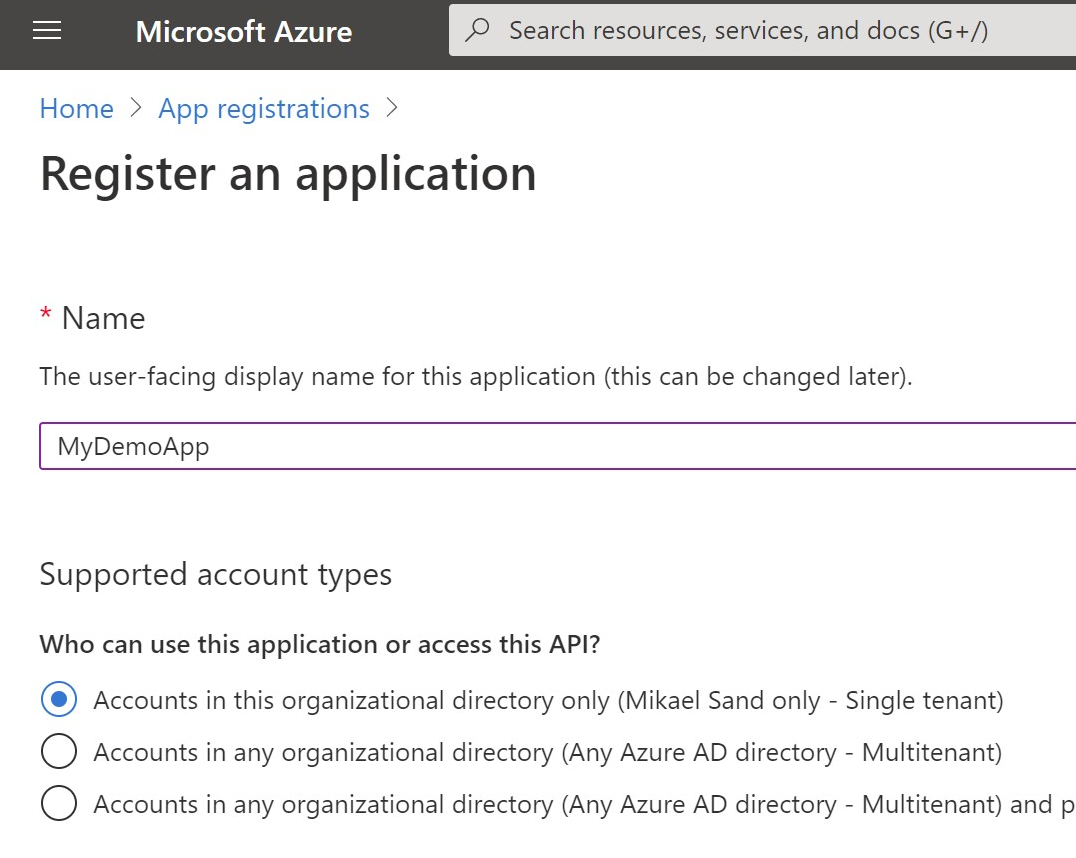
Create the App Registration
On the start page for App Registration, click New Registration at the top left.
- Give it a useful name. Better than
MyDemoApp - Make sure the top radio button is selected.
- Leave the Redirect URI blank and click the Register Button
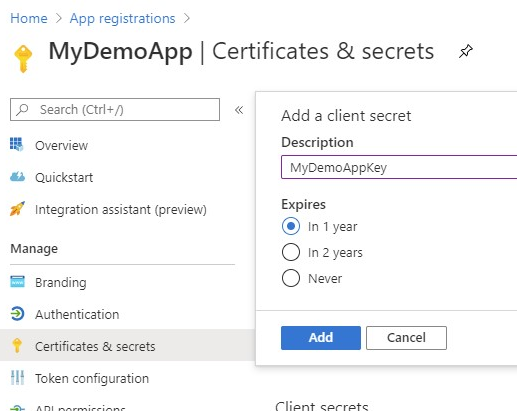
Create the App Secret
Remember to store the secret somewhere!!!
When you have registered your app you will be forwarded to its starting page.
- In the menu to the left, select Certificates & secrets
- In the new page, click the New client secret button.
- Give it a description and expiration (I always use 1 year for test and dev keys) and click Add.
- Important! Take it slow!
- Copy the value of the key created. This is the only time it is shown.

- Store the key for later use.
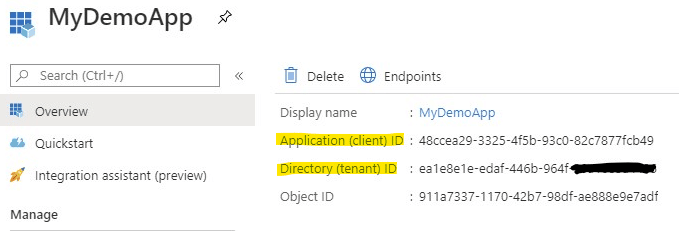
Where to find information you will probably need later
When using this App to log in or authenticate you will use additional information, beside the Client Secret.
- Go to the start page for the App Registration and choose your App.
- In the start page of your app you will find everything you usually need
- Here you will find the Client ID (under Application (Client) ID) and
- Tenant ID, which you need to get a token.